基于Spring的安全管理框架Spring Security
一、什么是 Spring Security?
Spring Security 是基于 Spring 框架的安全解决方案。它提供了全面的安全性功能,支持在 Web 请求级别和方法调用级别进行身份认证(Authentication)与授权(Authorization)。
在 Spring Framework 的基础上,Spring Security 充分利用了依赖注入(DI)和面向切面编程(AOP)功能,为应用系统提供声明式的安全访问控制。这不仅减少了为企业安全控制编写大量重复代码的工作,也是一个轻量级的安全框架,能够很好地与 Spring MVC 集成。
二、Spring Security 的核心功能有哪些?
- 认证(Authentication):验证某个用户是否为系统中的合法主体,即判断用户能否访问该系统。
- 授权(Authorization):验证某个用户是否有权限执行某个特定操作。
三、Spring Security 基于哪些技术实现?
核心实现技术:Filter、Servlet、AOP
众所周知,想要对 Web 资源进行保护,最好的办法莫过于 Filter;要想对方法调用进行保护,最好的办法莫过于 AOP。Spring Security 在进行用户认证以及授予权限时,通过各种各样的拦截器来控制权限的访问,从而实现安全。
Spring Security 功能的实现主要是由一系列过滤器链(Filter Chain)相互配合完成。
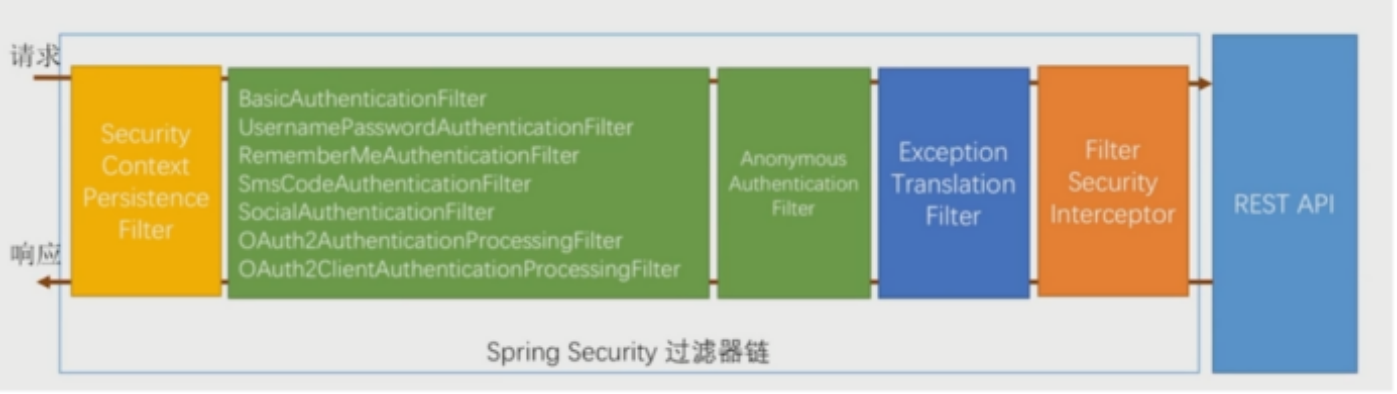
学习重点建议:
springSecurityFilterChain中各个过滤器是如何创建的,只需了解即可,无需太过关注。- 重点记忆
UsernamePasswordAuthenticationFilter、ExceptionTranslationFilter、FilterSecurityInterceptor这三个过滤器的作用及源码分析。 - 重点记忆认证过程中
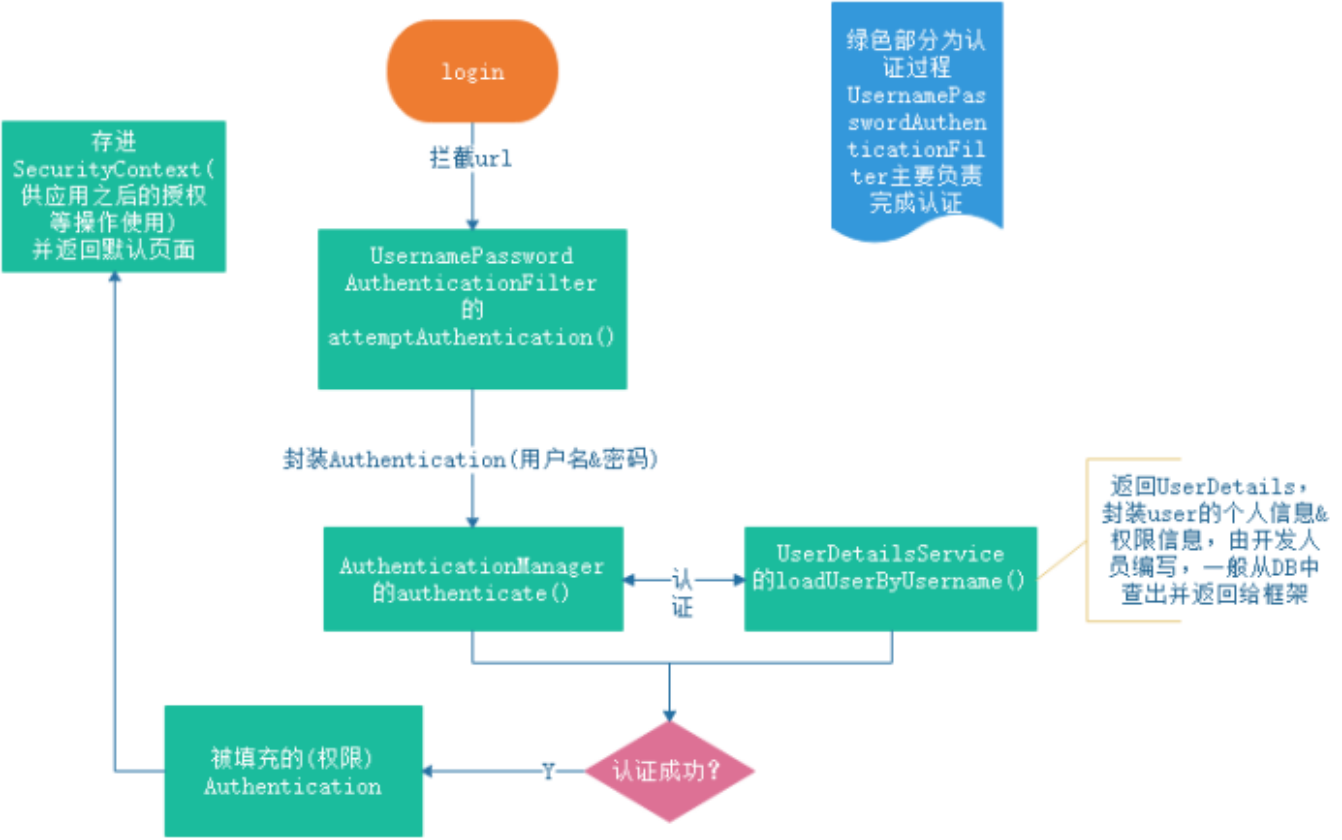
Authentication、AuthenticationManager、ProviderManager、AuthenticationProvider、UserDetailsService、UserDetails这些类的作用及源码分析。 - 重点记忆授权过程中
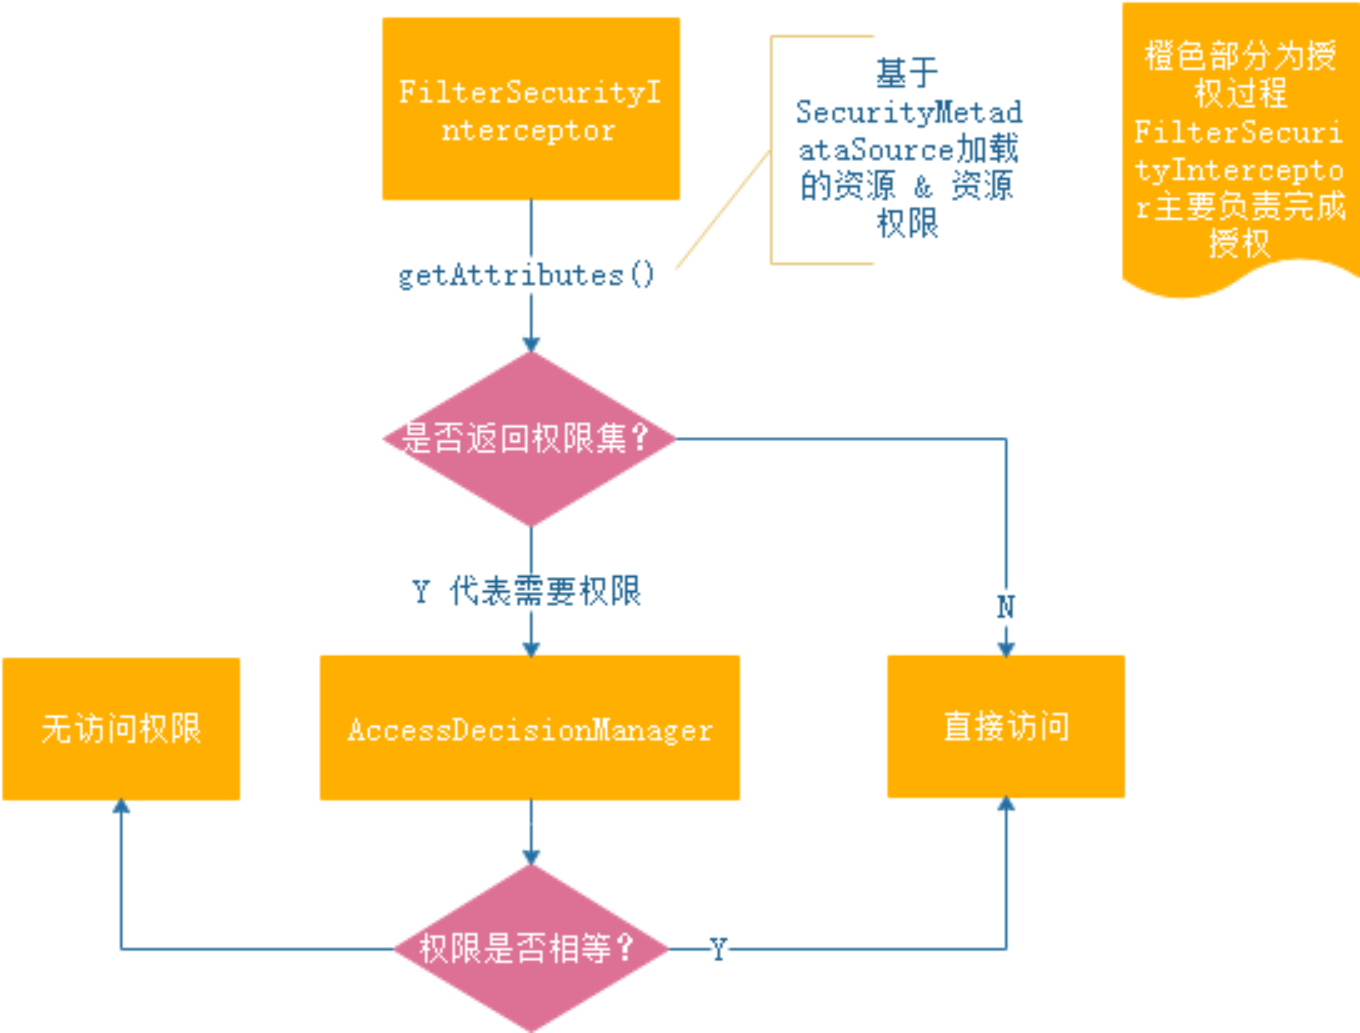
FilterInvocation、SecurityMetadataSource、AccessDecisionManager的作用。
四、框架的核心组件
- SecurityContextHolder:提供对
SecurityContext的访问。 - SecurityContext:持有
Authentication对象和其他可能需要的信息。 - AuthenticationManager:认证管理器,其中可以包含多个
AuthenticationProvider。 - ProviderManager:
AuthenticationManager接口的实现类。 - AuthenticationProvider:主要用来进行认证操作的类,调用其中的
authenticate()方法去执行认证。 - Authentication:Spring Security 方式的认证主体。
- GrantedAuthority:对认证主体的应用层面授权,含当前用户的权限信息,通常使用角色表示。
- UserDetails:构建
Authentication对象必须的信息,可以自定义,可能需要访问数据库得到。 - UserDetailsService:通过 username 构建
UserDetails对象,通过loadUserByUsername根据 userName 获取UserDetails对象。
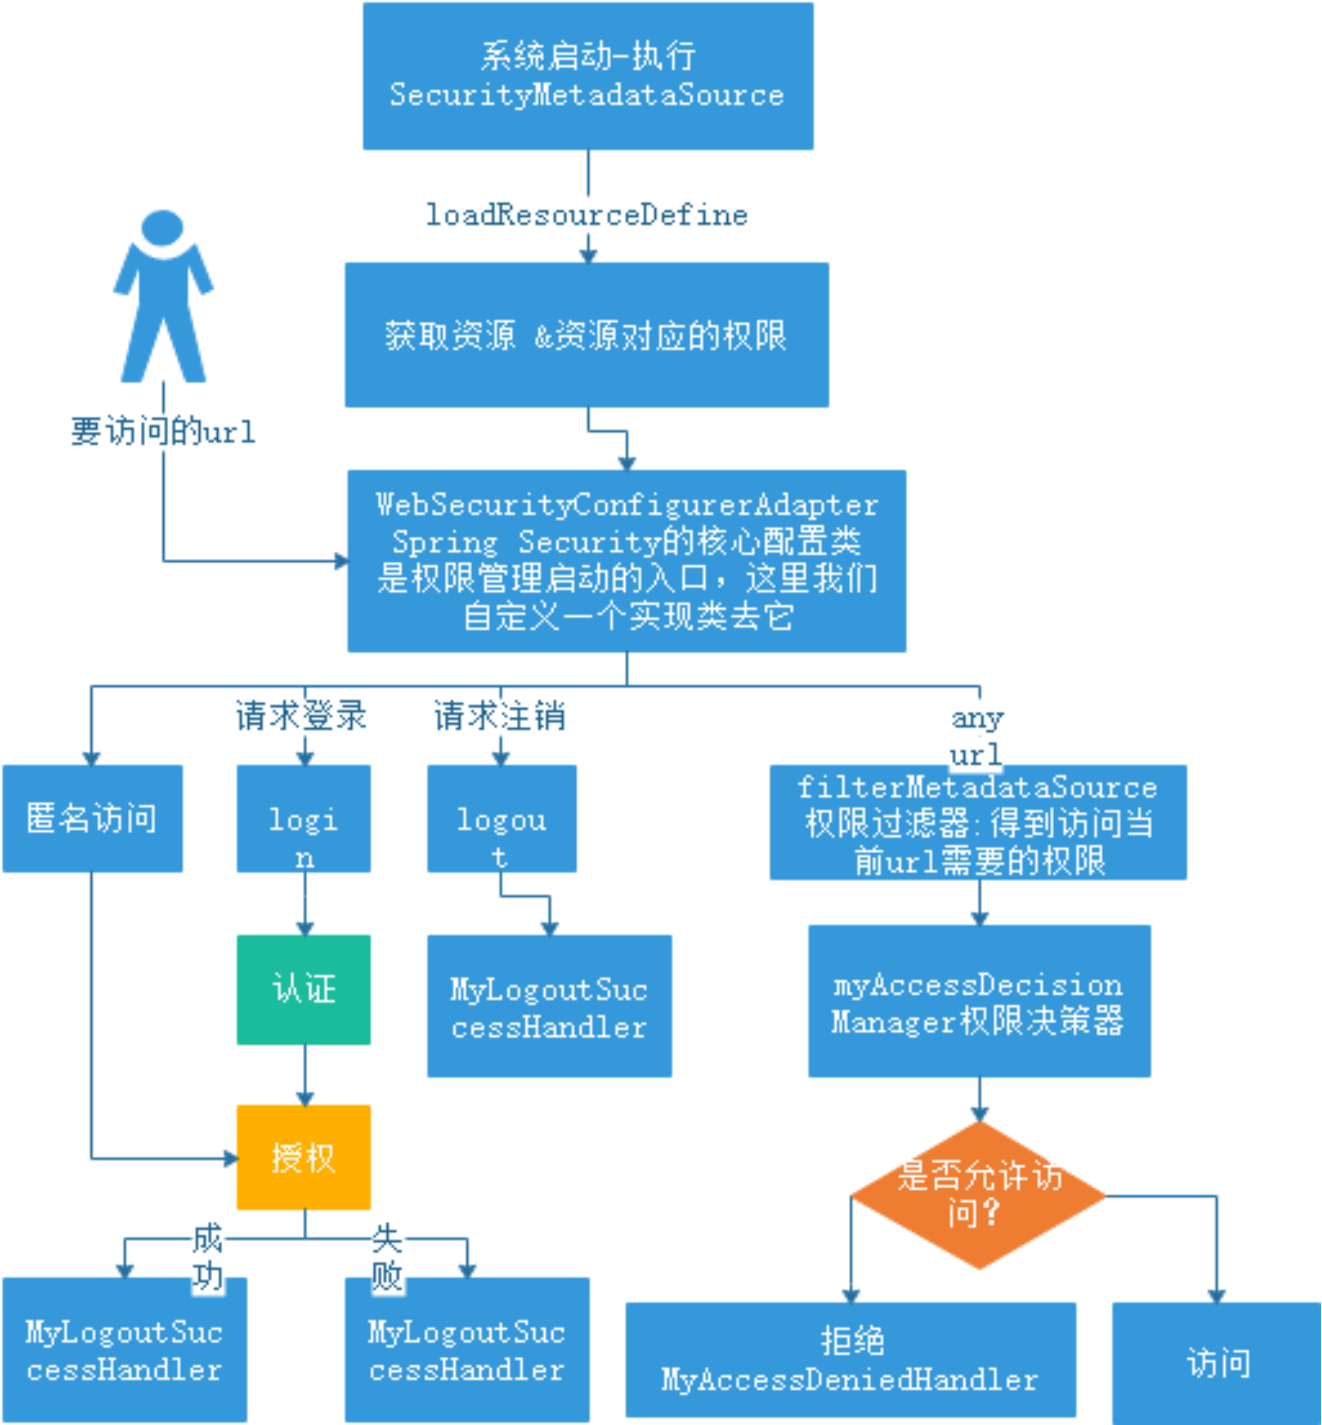
五、Spring Security 的工作流程
六、认证流程
七、授权流程
八、Spring Security 入门示例
1. 构建 Maven 项目,引入 Spring Security 相关依赖
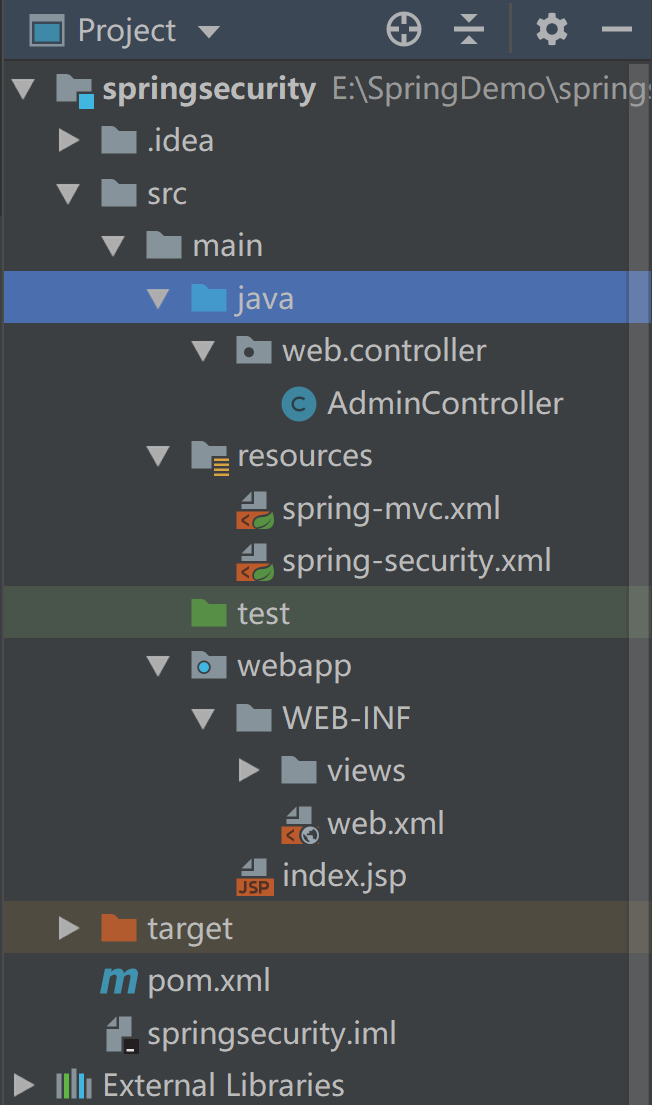
pom.xml 配置文件主要部分:
<properties>
  <spring.version>4.2.0.RELEASE</spring.version>
</properties>
<dependencies>
  <dependency>
    <groupId>junit</groupId>
    <artifactId>junit</artifactId>
    <version>4.11</version>
    <scope>test</scope>
  </dependency>
  <dependency>
    <groupId>org.springframework</groupId>
    <artifactId>spring-beans</artifactId>
    <version>${spring.version}</version>
  </dependency>
  <dependency>
    <groupId>org.springframework</groupId>
    <artifactId>spring-context</artifactId>
    <version>${spring.version}</version>
  </dependency>
  <dependency>
    <groupId>org.springframework</groupId>
    <artifactId>spring-webmvc</artifactId>
    <version>${spring.version}</version>
  </dependency>
  <dependency>
    <groupId>org.springframework.security</groupId>
    <artifactId>spring-security-web</artifactId>
    <version>${spring.version}</version>
  </dependency>
  <dependency>
    <groupId>org.springframework.security</groupId>
    <artifactId>spring-security-config</artifactId>
    <version>${spring.version}</version>
  </dependency>
  <dependency>
    <groupId>jstl</groupId>
    <artifactId>jstl</artifactId>
    <version>1.2</version>
  </dependency>
</dependencies>
2. 配置 web.xml
<context-param>
  <param-name>contextConfigLocation</param-name>
  <param-value>classpath:spring-security.xml</param-value>
</context-param>

<servlet>
  <servlet-name>springmvc</servlet-name>
  <servlet-class>org.springframework.web.servlet.DispatcherServlet</servlet-class>
  <init-param>
    <param-name>contextConfigLocation</param-name>
    <param-value>classpath:spring-mvc.xml</param-value>
  </init-param>
  <load-on-startup>1</load-on-startup>
</servlet>
<servlet-mapping>
  <servlet-name>springmvc</servlet-name>
  <url-pattern>/</url-pattern>
</servlet-mapping>
<listener>
  <listener-class>org.springframework.web.context.ContextLoaderListener</listener-class>
</listener>
<filter>
  <filter-name>springSecurityFilterChain</filter-name>
  <filter-class>org.springframework.web.filter.DelegatingFilterProxy</filter-class>
</filter>
<filter-mapping>
  <filter-name>springSecurityFilterChain</filter-name>
  <url-pattern>/*</url-pattern>
</filter-mapping>
<welcome-file-list>
  <welcome-file>index.jsp</welcome-file>
</welcome-file-list>
3. 书写 AdminController.java 类
@Controller
public class AdminController {
    @RequestMapping(value = {"/","/welcome**"}, method = RequestMethod.GET)
    public ModelAndView welcome(){
        ModelAndView welcome = new ModelAndView();
        welcome.addObject("title","Welcome");
        welcome.addObject("message","This is a Security Page");
        welcome.setViewName("hello");
        return welcome;
    }
    @RequestMapping(value = {"/","/admin**"}, method = RequestMethod.GET)
    public ModelAndView admin(){
        ModelAndView welcome = new ModelAndView();
        welcome.addObject("title","admin");
        welcome.addObject("message","This is Admin page");
        welcome.setViewName("admin");
        return welcome;
    }
}
4. 配置 spring-mvc.xml
<context:component-scan base-package="web.*"/>
<bean class="org.springframework.web.servlet.view.InternalResourceViewResolver">
    <property name="prefix" value="/WEB-INF/views/"/>
    <property name="suffix" value=".jsp"/>
</bean>
5. 配置 spring-security.xml
<security:http auto-config="true">
   <security:intercept-url pattern="/admin**" access="hasAnyRole('ROLE_USER')"/>
</security:http>
<security:authentication-manager>
    <security:authentication-provider>
        <security:user-service>
            <security:user name="admin" authorities="ROLE_USER" password="123456"/>
        </security:user-service>
    </security:authentication-provider>
</security:authentication-manager>
注意: 在<intercept-url pattern="/admin**" access="hasRole('ROLE_USER')"/>这句配置中,Spring Security 4.0 以后版本都使用hasRole('ROLE_USER')取代原来的ROLE_USER写法。
6. 准备页面
admin.jsp
<%@ page contentType="text/html;charset=UTF-8" language="java" isELIgnored="false" %>
<%@page session="true" %>
<%@taglib prefix="c" uri="http://java.sun.com/jsp/jstl/core" %>
<html>
<head>
    <title>Title</title>
</head>
<body>
   <h2>title:${title}</h2>
   <h2>message:${message}</h2>
   <c:if test="${pageContext.request.userPrincipal.name != null }">
       <h2>welcome you ,${pageContext.request.userPrincipal.name}</h2>
       <a href="<c:url value='/j_spring_security_logout'/>">Logout</a>
   </c:if>
</body>
</html>
hello.jsp
<%@ page contentType="text/html;charset=UTF-8" language="java" isELIgnored="false" %>
<html>
<head>
    <title>Title</title>
</head>
<body>
     <h2>title:${title }</h2>
     <h2>message:${message }</h2>
</body>
</html>
7. 启动 Tomcat,访问项目
访问地址:http://localhost:8080/springsecurity/admin
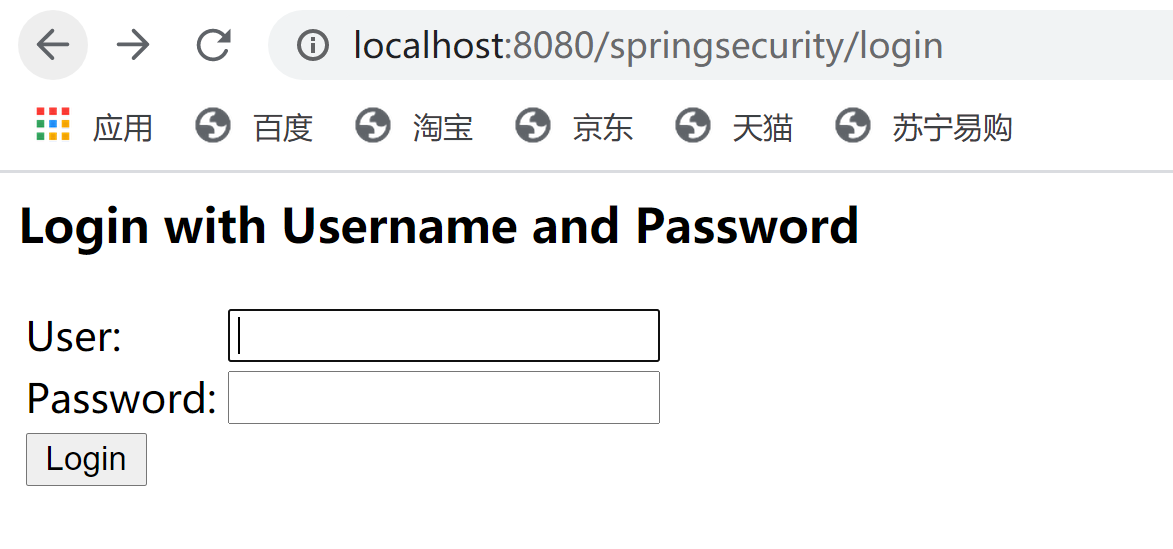
初次访问提示登录
初次访问 http://localhost:8080/springsecurity/admin 会提示登录,这是 Spring Security 为我们提供的默认登录页面。
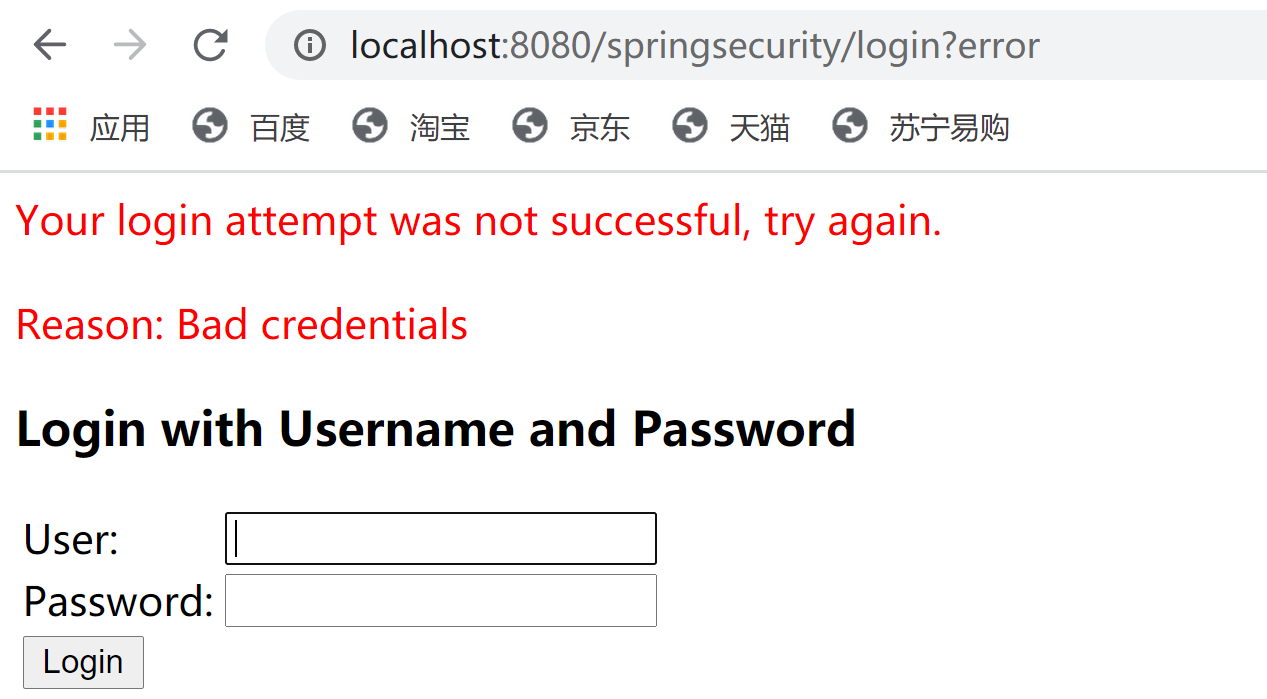
用户名或者密码错误,登录失败
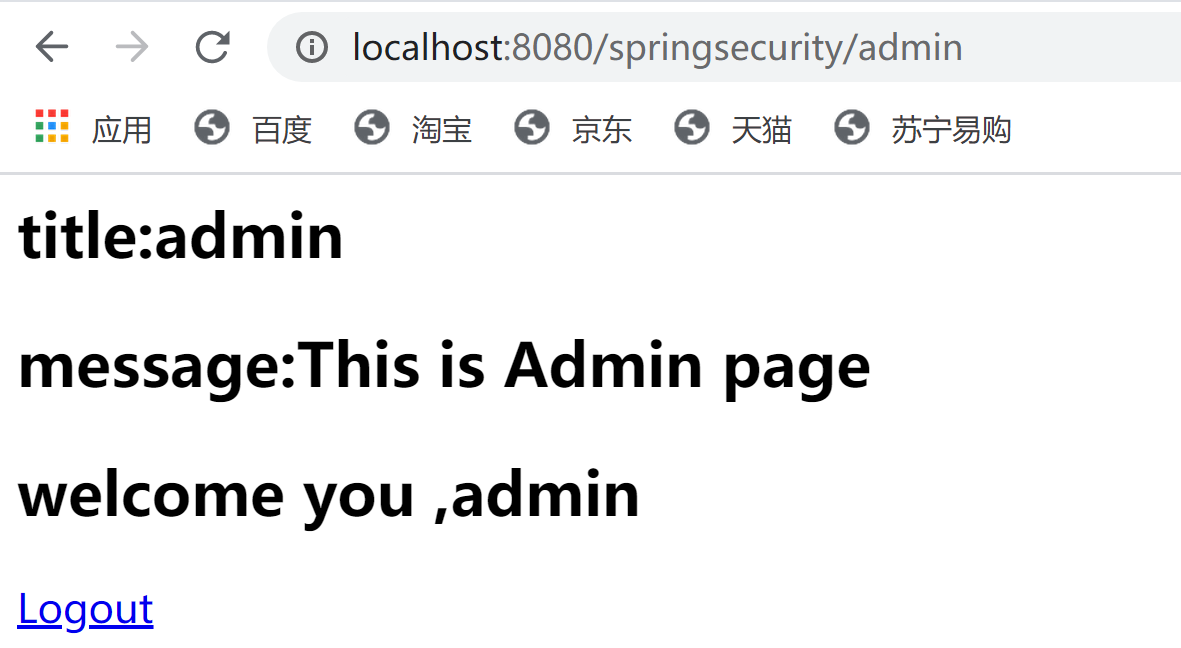
登录成功,跳转欢迎页面
参考资料
说明
版本时效性说明:本文示例基于 Spring Framework 4.2.0 及早期 Spring Security 版本(XML 配置方式)。当前主流开发多采用 Spring Boot 搭配 Spring Security 5.x/6.x,推荐使用 Java Config 方式进行配置,且依赖版本管理更为独立。文中代码逻辑供学习原理参考,实际新项目请查阅官方最新文档。
版权声明:本文为原创文章,版权归 戴老师的博客 所有,转载请联系博主获得授权。
本文地址:https://1diff.fun/archives/ji-yu-spring-de-an-quan-guan-li-kuang-jia-spring-security.html
如果对本文有什么问题或疑问都可以在评论区留言,我看到后会尽量解答。